We are going to cover Data validation techniques in Excel. Data validation is a very important feature of Excel document. This feature helps to prevent user from entering invalid data on the cell. Various types of data validation can be done in excel. How these validations can be applied in excel document is shown in this tutorial using an example. Please note that the data validation feature of Excel can be expanded to fit a vast majority of applications. Gaining a solid knowledge will greatly improve your Excel workflow.
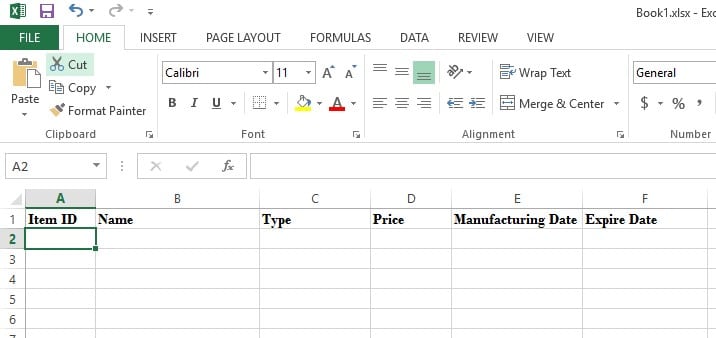
Suppose you have to enter data in product table with the following fields and restrictions.
| Item ID | : Numeric and start from 1 |
| Name | : Text and length must be between 10 and 50 characters |
| Price | : Decimal and must be between 10 and 1000 |
| Manufacturing Date | : Date and must be greater than or equal to specific date |
| Expire Date | : Date and must be greater than manufacturing date |
Lets get started learning Data Validation Techniques:
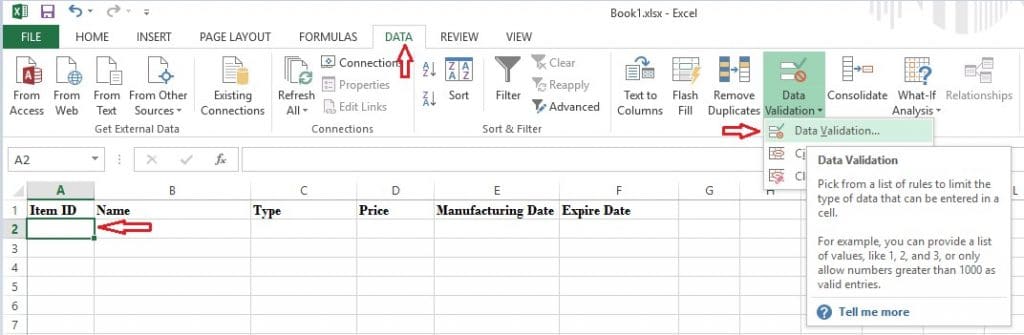
Select cell under Item ID and click on Data Validation toolbar button. Click on Data validation option to open Data Validation window.
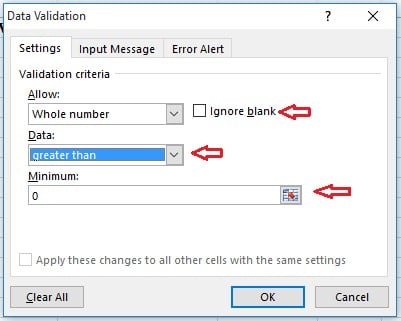
Uncheck Ignore blank option, select Whole number and greater than option.
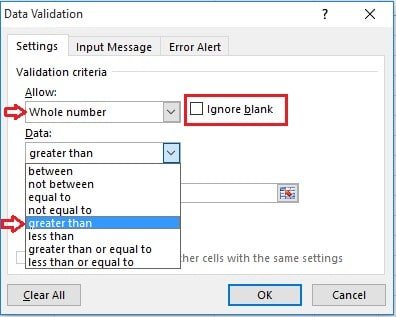
Data restriction for Item ID is number and greater than 0. So select 0 as minimum value to prevent user from entering 0 in this field.
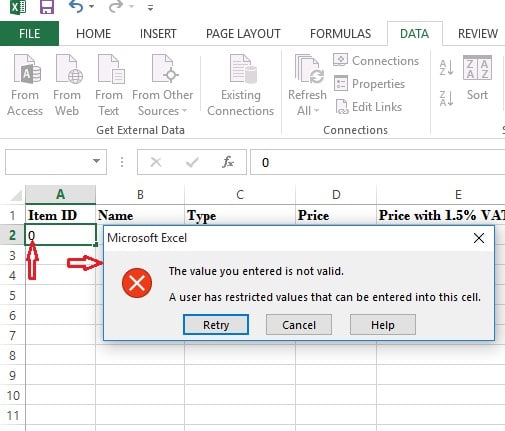
When the user will set 0 in this cell then the following error message will appear.
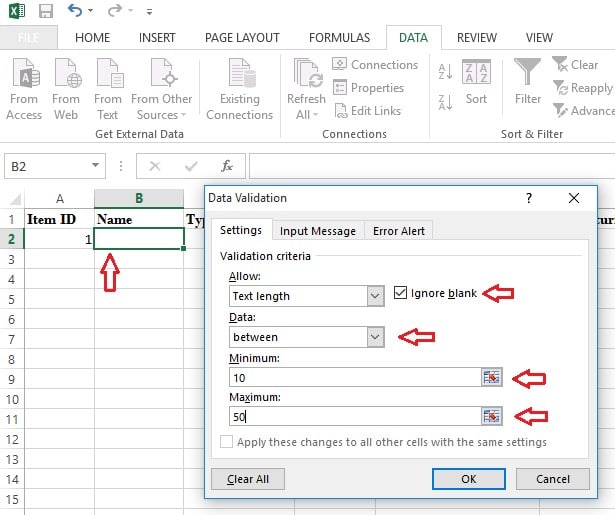
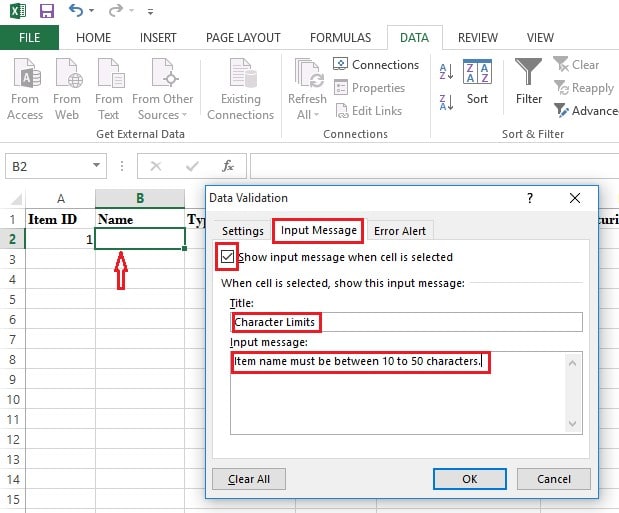
To set restriction for Name field add the following validation rule.
To set custom helping message for the user, use the following option of Data Validation window.
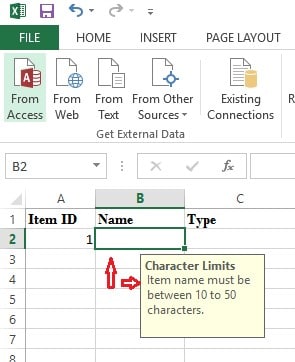
When the user will select the cell then the following message will appear.
To add Error alert message for invalid data use the following option of Data Validation window.
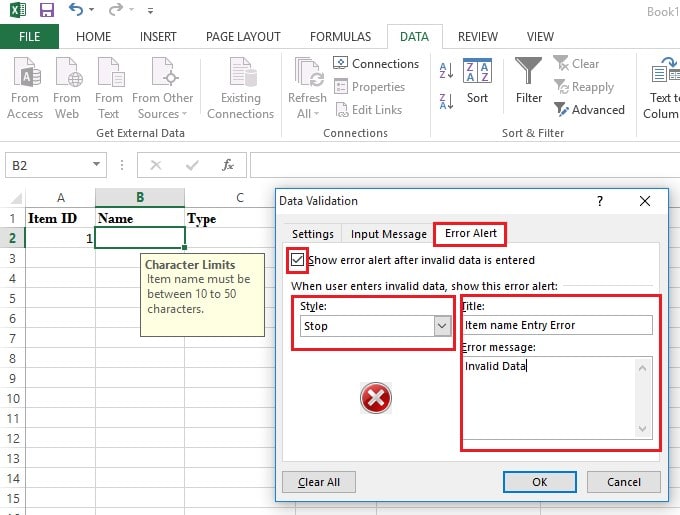
If the user will enter a product name less than 10 or greater than 50 then the following message will appear.

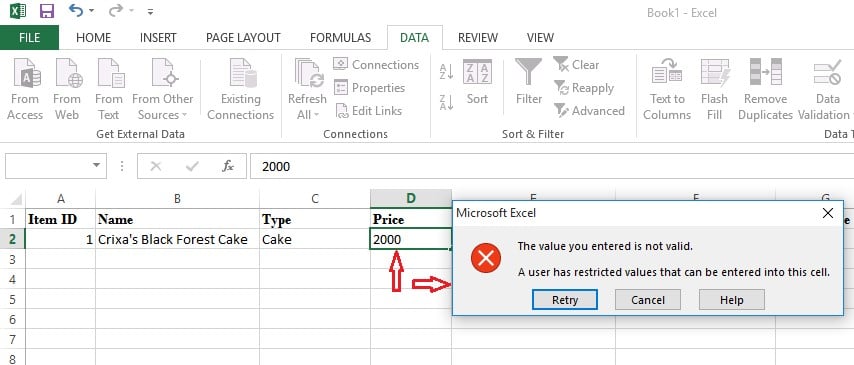
Add the validation for Price fields like below to set the restriction.
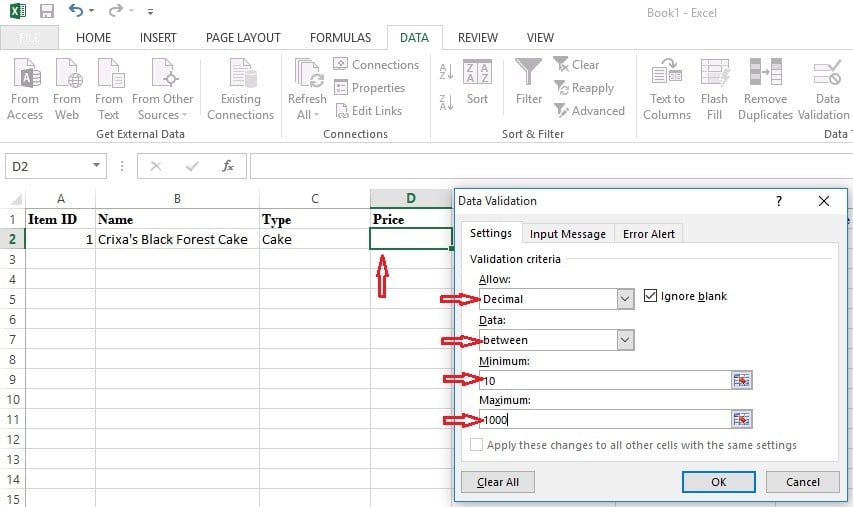
When the user will add Price value less than 10 or greater than 1000 then the following error message will appear.
Add the following rule for Manufacturing Date.
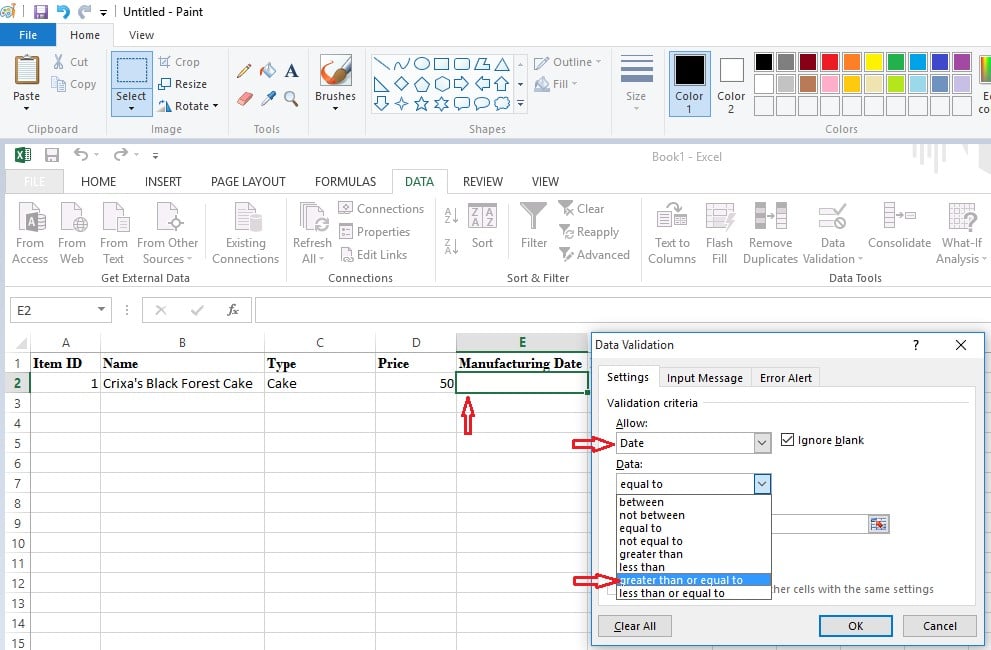
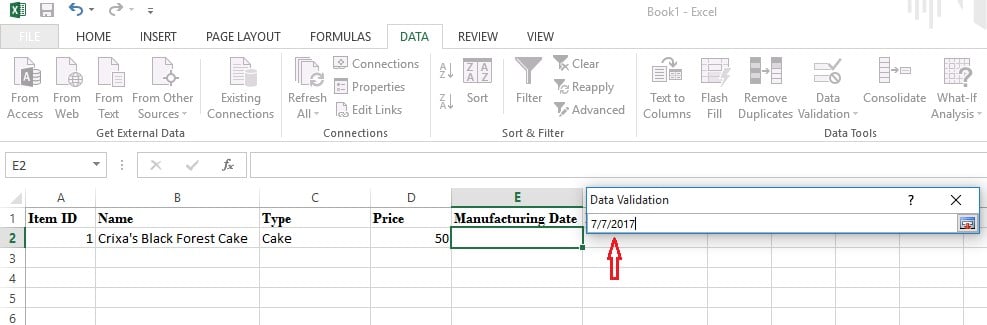
Here 7/7/2017 is set. So the user can add this date or any date more than this value.
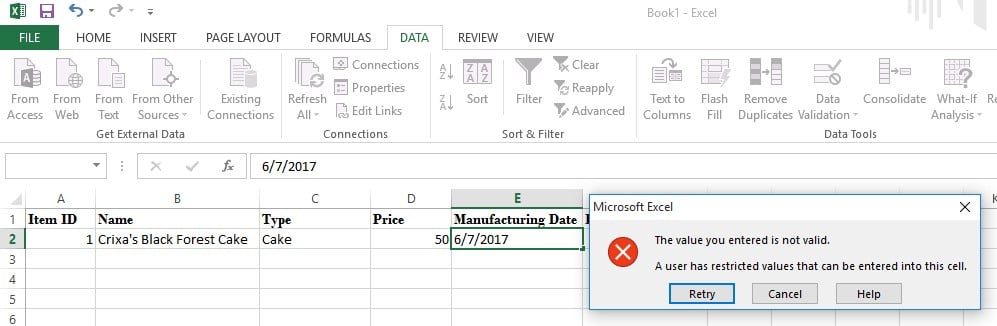
The following error will appear if the user enters any date below 7/7/2017.
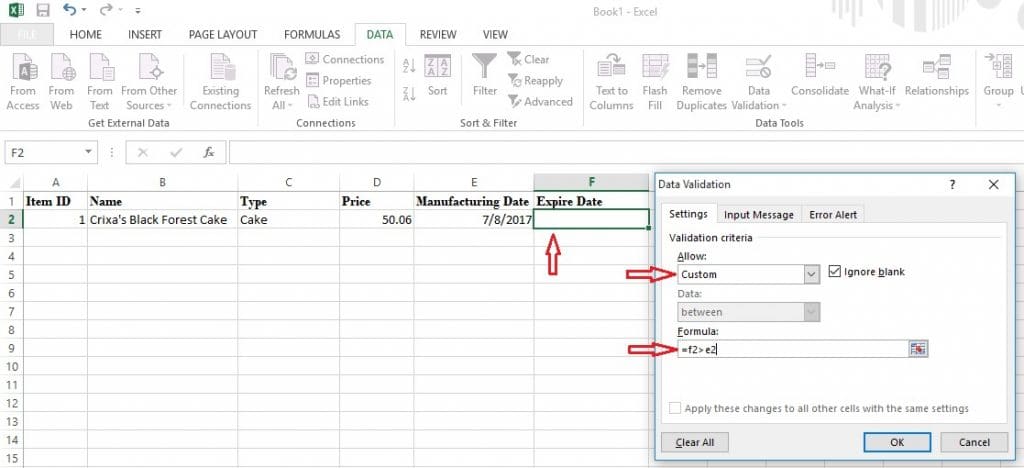
Add the following rule for Expire Date to restrict user from adding any date less than or equal to manufacturing date using custom rule. Add the formula, =f2>e2
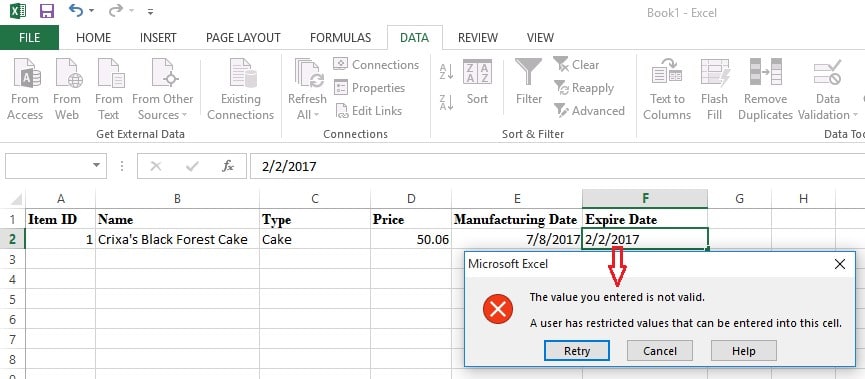
The following error will appear if the user enters invalid date.
Now your excel document is fully validated according to the above restrictions. If you have more questions regarding Data validation techniques in Excel, please let us know.